Blog

Glass Detailing Tips: Achieving a Streak-Free Shine
When it comes to vehicle detailing, cleaning the glass often seems like a simple task—until streaks show up and ruin the finish. Properly cleaning windows, mirrors, and windshields is an essential part of maintaining a vehicle’s appearance and safety. Clear, streak-free glass not only enhances the overall look of a car but also ensures better visibility for drivers, making it an important step in regular maintenance.
Glass detailing might seem straightforward, but getting a perfectly clean, streak-free shine takes more than just a spray and wipe. It requires the right products, tools, and techniques to achieve professional-level results.
Why Glass Cleaning Matters
Automotive glass faces constant exposure to dirt, grime, fingerprints, and environmental contaminants. Over time, these build up and can obscure visibility or give the vehicle a dull, neglected appearance. Additionally, improperly cleaned glass can become streaky or cloudy, defeating the purpose of the cleaning effort.
Clear glass makes a car look polished and put-together, but it’s also about safety. Windshields, in particular, must be clean to avoid glare from sunlight or headlights at night. A properly cleaned windshield ensures that drivers can see the road clearly in all conditions.
Steps to Achieve Streak-Free Glass
Achieving spotless, streak-free glass is all about preparation, the right products, and consistent technique. Here’s how to get it right:
1. Choose the Right Glass Cleaner
The first step in glass detailing is selecting the proper cleaner. Automotive glass cleaners are specifically formulated to handle grease, dirt, and smudges without leaving residue. Ammonia-free cleaners are the best choice, especially for tinted windows, as ammonia can damage tint films and rubber seals. Look for a product designed to break down contaminants without streaking.
2. Use the Right Tools
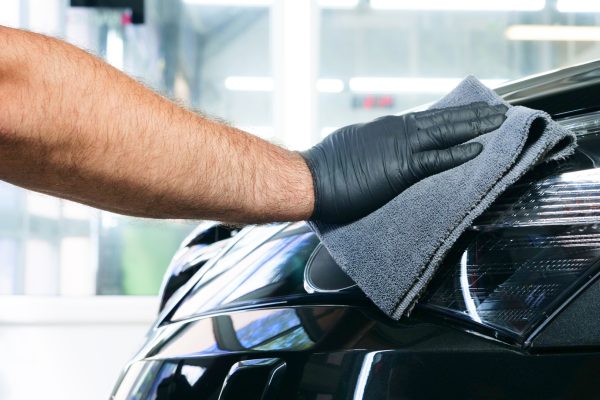
Microfiber towels are essential for glass cleaning. They are soft, absorbent, and won’t scratch the surface. Unlike paper towels, microfiber towels don’t leave lint behind, ensuring a cleaner finish. For stubborn spots, such as water stains or grime buildup, consider using a detailing brush or a dedicated scrubbing pad designed for glass.
3. Remove Loose Dirt First
Before applying any cleaner, start by removing loose dirt and debris from the glass. Use a dry microfiber towel or a soft brush to avoid spreading dirt during the cleaning process. This step prevents particles from scratching the glass when wiping.
4. Apply Cleaner Properly
Spray the glass cleaner directly onto the microfiber towel, not the glass. This reduces overspray and ensures the cleaner is applied evenly. For heavily soiled areas, allow the cleaner to sit for a few seconds before wiping to help break down tough grime.
5. Wipe in Straight Lines
Wipe the glass using straight, overlapping motions instead of circular movements. Start at the top of the window and work your way down to avoid streaks caused by cleaner dripping onto already-cleaned areas. This method ensures thorough coverage and minimizes streaking.
6. Pay Attention to the Edges
The edges of windows and windshields often collect the most dirt and grime. Use a smaller microfiber towel or a detailing brush to clean these areas thoroughly. Overlooking the edges can leave a noticeable residue that detracts from the overall finish.
7. Dry the Surface
After wiping with the cleaner, use a dry microfiber towel to buff the glass. This step removes any remaining moisture or streaks, leaving the surface crystal clear. A two-towel method—one for applying cleaner and one for drying—works best for streak-free results.
8. Inspect the Glass
After cleaning, inspect the glass under different lighting conditions. Glare from sunlight or artificial lights can reveal streaks or missed spots that aren’t visible in regular light. If necessary, repeat the cleaning process in those areas for a perfect finish.
Common Challenges and How to Address Them
Even with the right approach, some issues can arise during glass cleaning. Here’s how to tackle them:
- Water Spots: Hard water spots can be stubborn and may require a specialized cleaner or a water spot remover. Gently buff the area with a microfiber towel after applying the product to restore clarity.
- Interior Haze: Interior glass often develops a film from off-gassing materials like vinyl or plastics. Regular cleaning with an ammonia-free cleaner helps keep interior windows clear.
- Tinted Windows: Use tint-safe products to avoid damaging the film. Avoid harsh cleaners or scrubbing too hard on tinted surfaces.
Benefits of Proper Glass Detailing
Well-maintained glass isn’t just about aesthetics. Clear, streak-free windows, mirrors, and windshields enhance driver safety by improving visibility, particularly in adverse weather conditions or at night. Regular glass detailing also extends the life of the glass and prevents buildup that can lead to scratches or permanent damage.
From an aesthetic perspective, clean glass complements the overall detailing process, ensuring the vehicle looks its best. Whether preparing for a car show or simply maintaining daily use, glass detailing makes a significant impact on the vehicle’s appearance.
Final Thoughts
Glass detailing is a key part of vehicle care that often gets overlooked or rushed. By using the right products, tools, and techniques, achieving a streak-free shine is straightforward and rewarding. Clear glass not only enhances the look of a vehicle but also ensures safety on the road, making it an essential part of regular maintenance.
Attention to detail in glass cleaning reflects a broader commitment to vehicle care, ensuring that every surface—inside and out—is clean, functional, and well-maintained. With the right approach, even this small step can have a big impact on both appearance and performance.